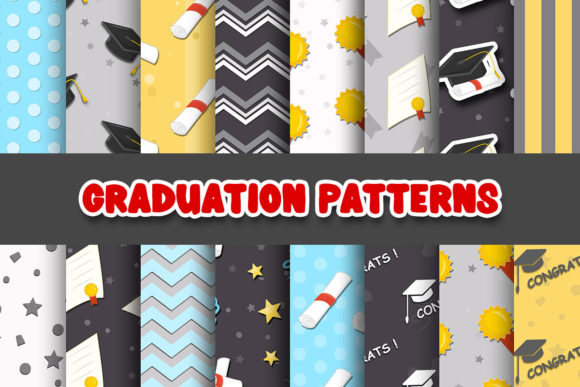
Graduation Digital Papers Patterns: Smart Choices for Polished Projects
When graduation season arrives, crafting memorable announcements, party decorations, scrapbook layouts, or client projects often starts with the right visual foundation. Graduation digital papers patterns provide that base—beautifully designed digital sheets featuring caps, diplomas, stars, ornate borders, or subtle school colors. They save time and offer creative versatility that plain cardstock or generic clip art can’t match. But jumping into a download without a clear plan often leads to regret: blurry prints, legal headaches, or designs that look amateurish no matter how much effort you pour in.
Whether you’re a teacher assembling classroom awards, an Etsy seller designing party packs, or a proud family member creating a photo album, the way you choose and handle these patterns matters more than the pattern itself. Let’s walk through the practical pitfalls and the better approaches that turn a potentially good idea into a genuinely impressive result.
What Graduation Digital Papers Patterns Really Are
At their core, graduation digital papers patterns are high-resolution image files—usually JPEG or PNG—created to mimic physical patterned paper. Designers build them as seamless repeats or single-sheet layouts featuring motifs tied to academic achievement. You’ll find styles ranging from watercolor florals intertwined with graduation caps, to elegant gold foil textures on navy backgrounds, to playful confetti bursts in school colors. Many packs include coordinating solids so you can mix and match without clashing.
These aren’t just “pictures of paper.” Good ones are 300 DPI (dots per inch) by default, sized at 12×12 inches or A4, giving you enough resolution to print clearly at full size or to crop into smaller elements. Understanding this fundamental specification is the first thing that separates disappointing results from sharp, professional-looking output. If you’ve ever printed an invitation and noticed pixelation or muddy colors, chances are the source file’s resolution or color profile was overlooked.
The Resolution Trap: Why “Big Enough” Often Isn’t
The single most common misstep I see: grabbing an image from a preview or a free social media graphic and assuming it will print well. Many beginners confuse screen display with print quality. A 72 DPI image that looks crisp on your monitor will turn into a soft, blocky mess on paper. When you’re evaluating graduation digital papers patterns, always check the stated resolution. Don’t rely on downloading a sample and zooming in on your phone—it gives a false sense of clarity.
Practical fix: Before purchasing or using any pattern, look for “300 DPI” in the description. If it’s not listed, ask the seller. For digital scrapbookers and printable party decor creators, this is non-negotiable. A pattern labeled “3600×3600 pixels” at 12 inches equates to 300 DPI. If you plan to print larger than the native dimensions—say, a poster or a table runner—you’ll need to either upscale carefully (which often adds softness) or find a pattern designed for larger output. Many professional paper packs are already sized for 12×12 scrapbook pages; stretching them to 18×24 without losing clarity requires vector-based alternatives or oversized rasters that few standard packs offer.
To avoid last-minute panic, decide your largest print size first, then work backward to find patterns with enough pixel dimensions. As an example, a 12×12 at 300 DPI yields 3600 pixels square. For a 16×20 print at 300 DPI, you’d need 4800×6000 pixels. No amount of savvy editing can truly recreate the missing data if the original file falls short. So skip the “I’ll make it work” gamble—start with files that already match the job.
Licensing Confusion That Can Hurt Your Business
This point especially matters for small business owners, Etsy sellers, and freelancers who use graduation digital papers patterns to create products they sell. Not all pretty patterns are legally clear for commercial use. Many packs are sold for personal use only, meaning you can’t put the design on a mug, invitation template, or party hat that you then sell to a client. Others allow commercial use with restrictions, such as no print-on-demand, no alteration, or a requirement to flatten the pattern into a new design so it can’t be extracted.
I’ve heard from several stationery designers who purchased a “commercial use” pattern only to discover later that it couldn’t be used on products that would be resold as digital downloads themselves. The license required the pattern to be printed on a physical product—no digital templates. That oversight can force you to either redesign everything or risk a copyright complaint. Always read the license terms before clicking “buy.” Look for phrases like “extended commercial license,” “allowed for POD,” or explicit statements covering your intended use. If the license PDF isn’t included or seems vague, reach out to the designer. Their answer (or lack of one) tells you everything you need to know.
For personal crafters making graduation party decorations for a single event, standard personal use is fine. But if there’s any chance your project might end up on a shop shelf, even accidentally, choose packs with clear commercial terms from the start. It’s a small amount of due diligence that protects your income and your reputation.
Color Matching Disappointments on Every Device
You’ve found a pattern with the perfect navy and gold combination. On your laptop screen, it’s regal and crisp. You print it, and suddenly the navy looks almost purple, or the gold turns muddy brown. That’s not the pattern’s fault—it’s the gap between your screen’s RGB color space and your printer’s CMYK ink capabilities, compounded by uncalibrated monitors.
Many digital paper packs are designed in RGB, which is standard for screens and some home printers that behave more like photo printers. But if you’re sending files to a professional print shop, they usually request CMYK. When you convert from RGB to CMYK without soft proofing, certain vibrant blues and bright oranges can shift dramatically. A practical step that saves both ink and disappointment: open the file in a program that supports CMYK preview, like Photoshop or Affinity Photo, and check how the colors translate. If you don’t have those tools, ask the seller if the pack includes CMYK versions or provides color profile advice. Some thoughtful creators include both RGB and CMYK folders right in the download.
Even with home printing, paper type changes perception. A glossy photo paper will intensify certain hues, while matte cardstock absorbs more ink and can dull them. Print a small test swatch on your chosen paper before committing to 50 invitations. That simple test takes minutes and prevents a costly mismatch between what you envisioned and what your guests or clients see.
Overcomplicating the Layout: When Patterns Fight Your Content
A common creative mistake—especially among those with an eye for design—is choosing the busiest graduation digital papers patterns and then trying to layer text and photos over them. A background full of caps, swirls, and confetti might look fantastic on its own, but once you add a graduate’s photo and event details, the result often feels chaotic. The eye doesn’t know where to land.
Better approach: Use the busy pattern as an accent, not the whole canvas. For example, let a solid color or a very subtle tone-on-tone pattern occupy the main card face, and insert a strip or a die-cut shape with the lively pattern on the side. Alternatively, lower the pattern’s opacity to create a watermark effect, pushing it back so your text remains readable. Many graduation digital papers packs include two or three coordinating patterns that are intentionally less dense for exactly this reason. Use them as primary backgrounds and reserve the showstopper pattern for envelope liners, bunting flags, or decorative borders.
Think about the final piece from the reader’s perspective. On an invitation, the most critical information—name, date, time—should be instantly legible even in a quick glance. If your background fights the type, the design fails its purpose. So pair patterns thoughtfully: let one do the heavy lifting in the spotlight, and another support quietly in the background.
Skipping the File Format Strategy
Not every graduation digital papers pattern needs to be a JPEG. Many designers also supply PNGs with transparent elements, or even layered PSD/AI files. If you’re creating a collage in Canva, a high-quality JPEG on a white background works fine. But if you want to overlay a diploma illustration on top of another pattern without a white box showing, you’ll need a PNG with a transparent background. I’ve watched creators waste hours trying to erase white backgrounds from flattened JPEGs using clunky selection tools, and the edges always look jagged.
When you buy a pack, check the file list. A set might include both JPEG and PNG versions of the same patterns, or it might offer individual elements as transparent overlays. Prioritize packs that give you that flexibility. If you work across multiple software programs—maybe Procreate on iPad for custom drawing, then Photoshop for assembly—non-destructive formats like TIFFs with layers are worth seeking out. Yes, they make the download bigger, but they save you from rebuilding elements from scratch.
What to Check Before You Download or Buy
A thoughtful pre-purchase checklist shields you from most of the frustration beginners face. First, confirm the dimensions and resolution: 300 DPI at a minimum, with the size matching your largest planned use. Next, verify the color mode—RGB is typical, but if you need CMYK, look for it explicitly. Examine the license to see if it covers your specific use case, whether personal, commercial physical products, or digital resale. Read a few reviews if available; buyers often mention print quality or missing files. Finally, glance at the coordination within the pack: does it offer a balanced mix of busy and subtle patterns, solids, and perhaps a few standalone elements like stars or bunting?
If you’re a marketer or blogger creating downloadable content for a graduation-themed lead magnet, also consider file size. A 100 MB pattern set might be hard to email, but a well-organized pack with web-optimized previews and separate print-ready files gives you the best of both worlds. Some designers even provide a PDF with small-sized samples for quick mockups—a thoughtful touch that speeds up your workflow.
Making the Patterns Work Smarter, Not Harder
Once you have the right files, a few habits elevate your finished work. Use templates for your specific project type. If you’re designing an invitation, place the pattern into a pre-built invitation template that already has margins and text placement accounted for. This keeps you from accidentally putting critical details in an area that gets trimmed off. For scrapbook pages, start with a layered template that includes photo mats and journaling spots, then clip your chosen pattern to those shapes. You’ll create a polished look without hours of trial and error.
Also, name your layers or files meaningfully. “Party_pattern_busy.jpg” is easier to sort than “Paper12b.jpg” when you’re assembling a complex project. This small organizational step prevents you from accidentally using the wrong variation and having to redo everything later.
Finally, don’t underestimate the power of subtle recoloring. Many patterns can be tinted within your design software using hue/saturation adjustments or overlay layers. If the pack’s only gold looks a bit too yellow next to your school’s actual logo shade, a quick hue shift can bring it into harmony. Just be careful not to push colors so far that they clip or look unnatural. A light touch goes a long way.
Graduation digital papers patterns open a world of creative possibility when they’re matched to the right purpose, printed with awareness, and handled with a bit of digital craft. The difference between “It looked better on screen” and “Wow, you made that?” usually comes down to those preparatory steps—testing, licensing, and simple file checks—that don’t require advanced skills. They just require caring about the outcome. And honestly, both your design and your peace of mind are worth that care.