Anchor Doodle Seamless Pattern: A Practical Guide for Designers, Makers, and Brand Builders
When a project calls for a relaxed maritime aesthetic—be it for product packaging, a website background, or printed fabric—few assets deliver with as much versatility as an Anchor Doodle Seamless Pattern. This type of pattern combines hand-drawn anchor motifs with a repeating tile structure, allowing the design to flow continuously across any surface. For professionals managing tight deadlines and multiple brand guidelines, understanding how to source, evaluate, and implement such a pattern can eliminate hours of manual rework. This article unpacks where the anchor doodle pattern fits into real workflows, how it interacts with other tools, and what practical steps you can take to integrate it smoothly into your next project.
What Defines an Anchor Doodle Seamless Pattern
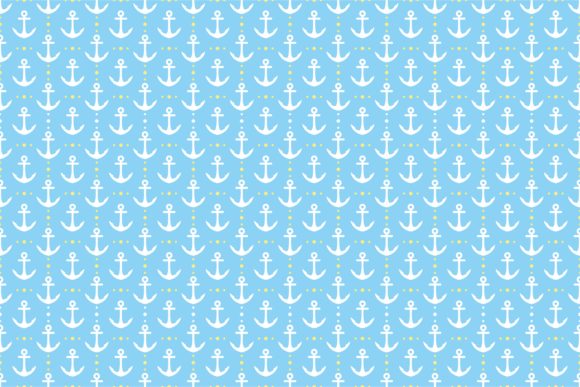
Unlike a simple illustration of an anchor, a seamless pattern is engineered to repeat without visible edges. The “doodle” style implies a hand-sketched, informal look—often featuring loose lines, slight imperfections, and a sense of movement. When applied as a fill, this pattern can cover a business card, a website hero banner, or an entire bolt of cloth with no obvious break points. The assets are usually delivered as high-resolution JPEG, PNG, or vector files accompanied by a tileable swatch. Knowing these technical details upfront helps you avoid scaling issues or mismatched color modes later.
How the Pattern Fits into a Typical Creative Workflow
Most design workflows move through phases of ideation, mockup, refinement, and production. An anchor doodle pattern can enter at any stage, but its role shifts depending on when you introduce it.
- Early exploration: Use low-res previews to build mood boards or test different colorways in a quick digital collage. This helps clients or stakeholders visualize a nautical direction before committing to a specific tile.
- Mid-project application: Once a direction is approved, swap in the high-res seamless file. At this point, you can adjust scale, opacity, and layer blending to match surrounding elements like typography or photography.
- Production handoff: For print jobs, confirm that the pattern is in CMYK format with an appropriate resolution (at least 300 DPI at the intended print size). For web use, exported PNGs or SVGs with a defined repeat area keep page loads fast and layouts crisp.
Preparing the Asset for Your Toolset
Compatibility starts with understanding the file formats you will receive or create. An anchor doodle seamless pattern often comes as:
- A pat file for Adobe Photoshop, which loads directly into the pattern overlay or fill options.
- An .ai or .eps vector file that can be dragged into Illustrator’s swatches panel and applied to any shape.
- A high-resolution raster image that you can manually define as a pattern in tools like Affinity Designer, Procreate, or even Canva for quick social media graphics.
Before placing the pattern into your working document, open it in isolation and check the tile boundaries. Zoom in to at least 400% and run your eye along the seams. A well-constructed pattern will hide the repeat edge even at high zoom. If you spot a thin line or misalignment, a quick clone‑stamp pass or a slight offset filter in Photoshop can often fix it—saving you from starting over with a new asset.
Integrating with Other Design Elements
An anchor doodle pattern rarely stands alone. It interacts with backgrounds, text overlays, cut lines, and other graphic motifs. For a cohesive result, consider how the pattern’s visual weight cooperates with these components.
- Typography: Hand-drawn doodles pair well with clean sans‑serif fonts that provide contrast. If your text is bold and modern, the pattern feels intentional rather than messy. Test legibility by placing text over the pattern; apply a subtle white or dark overlay if the doodle lines compete for attention.
- Color palettes: Most pattern licenses allow you to recolor the design, but vector versions make this effortless. Match the anchor stroke to a secondary brand color, or create a monochrome version for a more subtle background. Keeping the palette limited to three or four tones prevents visual clutter.
- Photography: When overlaying on photos, try reducing opacity to 10‑20% or using a blending mode like Multiply or Soft Light. The pattern then adds texture without drowning out the image subject—ideal for product mockups or website headers.
Organizing Patterns for Team Use
If you work in a shared environment—whether a design agency or a marketing department—consistent asset management prevents colleagues from using outdated or incorrect versions. Create a central folder labelled with the pattern name, color variant, and file type, for example: Anchor_Doodle_Navy_PAT_CMYK.pat. Add a small text file that notes the original repeat dimensions and license terms (such as personal versus commercial use). This small step reduces friction when another team member needs to open a file six months later and cannot recall the specifics.
For teams using cloud‑based design tools like Figma or Canva for social templates, save the pattern as a shared style or upload it to the brand asset library. When the pattern is easy to find and apply, it gets used consistently across email headers, blog graphics, and PDF guides—strengthening the visual identity.
Efficiency Gains Without Sacrificing Quality
A seamless pattern streaminglines several repetitive tasks. Instead of creating a new nautical backdrop each time, you have a ready‑to‑go tile. For small businesses selling on multiple print‑on‑demand platforms, a single anchor doodle pattern can populate an entire product line: tote bags, phone cases, notebooks, and apparel. Once you set up product templates with the pattern in the correct size and color profile, fulfilling new orders becomes a matter of dropping in the design—allowing you to scale the product range without proportionally scaling the design workload.
Yet efficiency should not override quality control. A pattern that looks perfect on screen can reveal flaws when printed on physical goods. Always order a single sample print before committing to a bulk run. Check how the anchor motifs wrap around curved surfaces like mugs or along the hem of a t‑shirt. Minor adjustments to the repeat scale or rotation can fix awkward cropping and give a much more polished final product.
Common Use Cases Across Industries
The anchor doodle aesthetic fits obvious nautical themes—yacht clubs, sailing events, coastal restaurants—but it extends further than many first realize.
- Stationery and branding: A modest, repeating anchor doodle on the back of a business card or envelope liner adds personality without overwhelming the primary logo. Educators and coaches in coastal regions often use such patterns for workshop handouts or presentation decks.
- Merchandise and apparel: Entrepreneurs building a lifestyle brand around sailing, travel, or summer wear can apply the seamless pattern to fabric textures, creating a consistent line that feels cohesive across different products.
- Digital backgrounds: Bloggers and content creators incorporate the pattern into social media quote cards or video backdrops. Because the pattern tiles, it adapts to any screen ratio without stretching or pixelation.
- Home decor and DIY: Hobbyists download the digital paper for scrapbooking, decoupage, or custom drawer liners. The seamless nature means you can print the pattern on letter‑sized paper and tile it across a larger surface manually, much like wallpaper.
Maintaining Consistency Across Campaigns
When a brand commits to a signature pattern, consistency becomes a valuable asset. Use the exact same tile dimensions and colors for every touchpoint. If you alter the anchor thickness or the spacing even slightly, the variation will be noticeable to repeat customers, even if they cannot articulate why. Treat the pattern file as you would a logo master file: keep a pristine original and create copies for each project‑specific adjustment. This way, you can always return to the source version for the next campaign, avoiding gradual drift in appearance.
Long‑Term Value and Reusability
Unlike a one‑time graphic, a seamless pattern remains useful for years. As your projects evolve, you can reinterpret the same design: desaturate it for a more vintage feel, add a distressed overlay for a worn look, or combine it with a different motif to create a fresh hybrid pattern. The anchor doodle pattern thus moves from a single‑use asset to a core resource in your visual toolkit. For freelancers and agencies, this means a single well‑chosen purchase or download can serve multiple clients, provided the license allows such use.
Adapting the Pattern for Different Mediums
Print, web, and video each bring their own demands. For the web, keep file size small by using a skinny JPEG or a compressed SVG. Define the pattern as a CSS background with background‑repeat: repeat; and it will fill any container without additional requests. For video, the pattern might appear in an end card or as a lower‑third graphic; here, a loopable animation of the doodle lines can add motion without much production effort. For large‑format print, double‑check with the printer whether they prefer a placed tile or if you should pre‑build the entire artwork at full size to avoid any slight seam visibility on a wide banner.
Working with Licenses and Originality
Before integrating any pattern, review the usage rights. Many marketplaces sell anchor doodle seamless patterns with a standard commercial license that covers physical products and digital designs but limits redistribution or reselling of the pattern file itself. If your business model involves selling digital scrapbooking kits or templates that include the pattern, you need an extended license. Clarifying these details upfront prevents legal headaches and respects the creator’s work. Additionally, if the pattern will become part of your brand identity, you might commission a custom version that guarantees exclusivity—no one else will use the same tile.
Practical Tips for Immediate Implementation
- Test the pattern at multiple scales. An anchor that looks too large on a business card might be just right on a tote bag. Keep the scale proportional by holding the physical mockup at the intended viewing distance.
- Always keep the original file untouched. Work on duplicates so you can revert if color adjustments go too far.
- Name your pattern layers clearly in the design file (e.g., “Anchor_Doodle_Scale_75%”). This saves time when handing off to a printer or collaborator.
- If you need to print at an unusual size, check if the pattern can be tiled seamlessly in both directions. Some patterns are designed for horizontal or vertical repeats only—a detail easily missed until you see an unexpected line in a large‑format print.
Evolving the Pattern Over Time
No asset needs to remain static. After a few projects, you may notice that a lighter, pencil‑sketch style works better for greeting cards while a bolder, inked version suits apparel. By adjusting stroke weight, changing the anchor shape slightly, or adding small companion doodles like ropes or waves alongside the anchors, you can build a family of related patterns. These variations still feel connected, allowing you to target different market segments without starting from scratch. When managed well, the anchor doodle seamless pattern becomes a launchpad, not a dead end.
Summary of Integration Points
A reliable nautical pattern sits at the intersection of creativity and practicality. It saves time on repetitive background creation, adds a cohesive visual thread to multi‑channel campaigns, and offers enough flexibility to be recolored, scaled, and repurposed across wildly different projects. By focusing on file compatibility, upfront testing, clear organization, and consistent application, you turn a simple design asset into a quiet workhorse that supports your larger goals. Whether the next use is a client presentation deck, a line of summer merchandise, or a personal scrapbook, the anchor doodle seamless pattern can be a steady, repeatable advantage.